

Hello, it’s me again. In my 2nd article documenting my AWS journey, I want to share how to set up a web server in an AWS EC2(Free tier). Note; you will first need to sign up to AWS(https://aws.amazon.com/resources/create-account/) if you do not already have an AWS account.
What exactly is AWS? AWS (Amazon Web Services) is a comprehensive, evolving cloud computing platform provided by Amazon that includes a mixture of infrastructure as a service (IaaS), platform as a service (PaaS) and packaged software as a service (SaaS) offerings. AWS provides servers, storage, networking, remote computing, email, mobile development, and security.
The AWS Free Tier provides customers the ability to explore and try out AWS services free of charge up to specified limits for each service. The Free Tier is comprised of three different types of offerings, a 12-month Free Tier, an Always Free offer, and short term trials (please visit AWS Free Tier for more info). I digress, What is an AWS EC2?
Amazon Elastic Compute Cloud (Amazon EC2) is a web service that provides resizable compute capacity in the cloud. It is designed to make web-scale cloud computing easier for developers.
Amazon EC2’s simple web service interface allows you to obtain and configure capacity with minimal friction. It provides you with complete control of your computing resources and lets you run on Amazon’s proven computing environment. Amazon EC2 reduces the time required to obtain and boot new server instances to minutes, allowing you to quickly scale capacity, both up and down, as your computing requirements change.
Now, let’s get down to business.
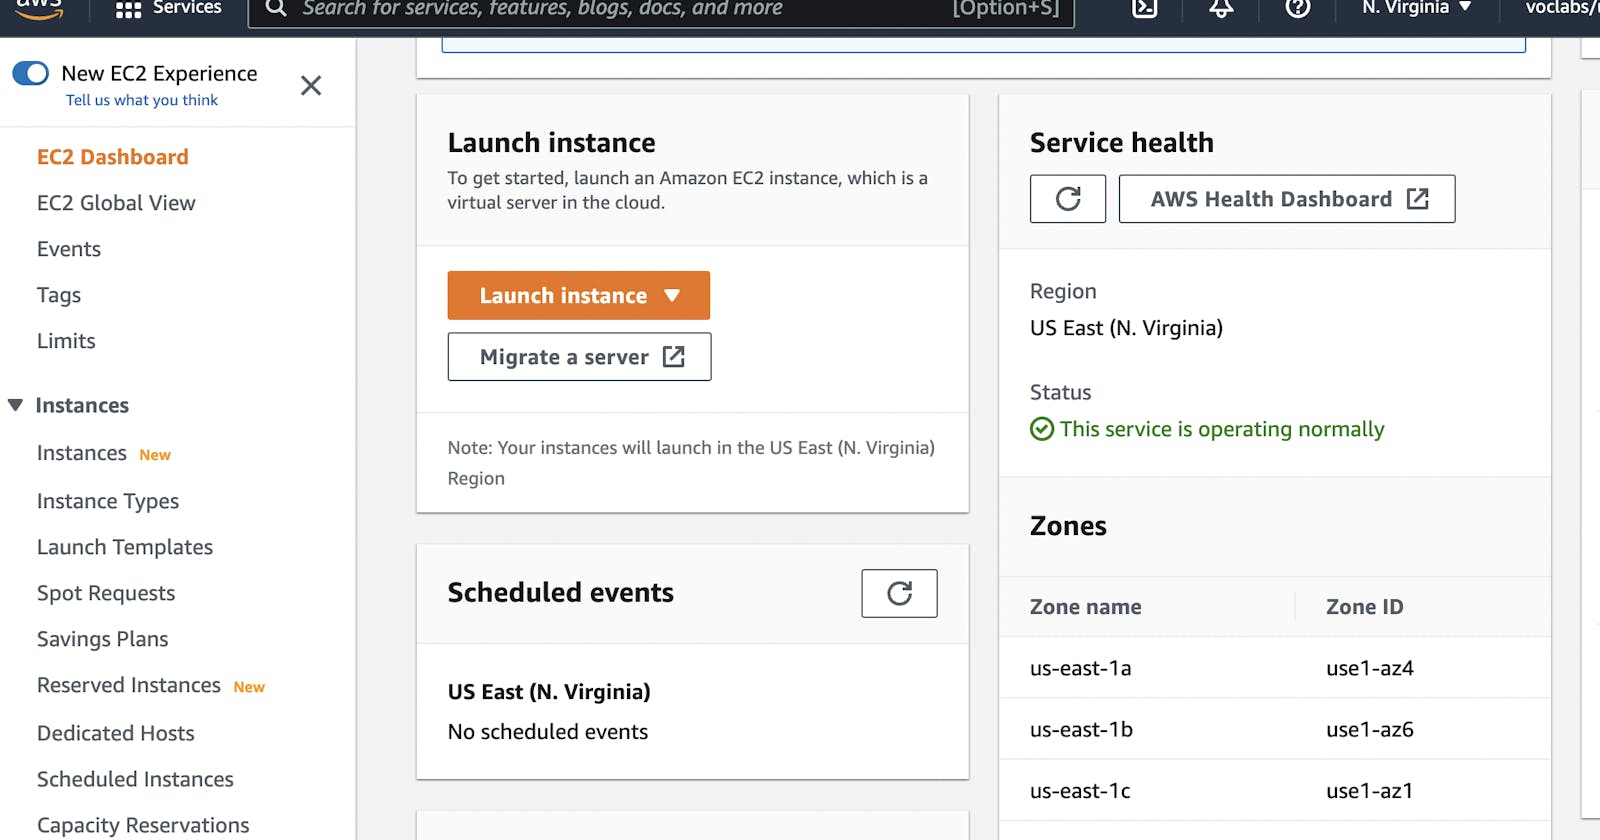
Launch Your Amazon EC2 Instance
- In the AWS Management Console, select the Services menu, and then select EC2 under Compute.
- Click Launch instance followed by Launch instance again.
Launch Amazon EC2 instance
Choose an Amazon Machine Image (AMI)
An Amazon Machine Image (AMI) provides the information required to launch an instance, which is a virtual server in the cloud.
- Click Select next to Amazon Linux 2 AMI (at the top of the list).

Amazon Linux 2 AMI
Choose an Instance Type
Amazon EC2 provides a wide selection of instance types optimized to fit different use cases. You will use a t2.micro instance (free tier) which should be selected by default. This instance type has 1 virtual CPU and 1 GB of memory.
- Click Next: Configure Instance Details
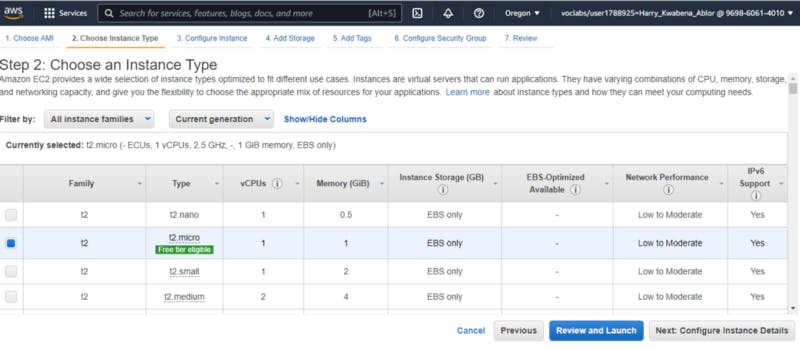
Choose an Instance Type
Configure Instance Details
This page is used to configure the instance to suit your requirements. This includes networking and monitoring settings.
- Scroll down, then expand Advanced Details. A field for User data will appear.
- Copy the following commands and paste them into the User data field:
#!/bin/bash
yum -y install httpd
systemctl enable httpd
systemctl start httpd
echo '
Hello From Your Web Server!
' > /var/www/html/index.html3. The script will:
- Install an Apache web server (httpd)
- Configure the web server to automatically start on boot
- Activate the Web server
- Create a simple web page
4. Click Next: Add Storage

Configure Instance Details
Add Storage
Amazon EC2 stores data on a network-attached virtual disk called Elastic Block Store.
- Click Next: Add Tags
Add Tags
Tags enable you to categorize your AWS resources in different ways, for example, by purpose, owner, or environment. This is useful when you have many resources of the same type — you can quickly identify a specific resource based on the tags you have assigned to it. Each tag consists of a Key and a Value, both of which you define.
Click Add Tag then configure:
Key:
Name- Value:
Web Server
2. Click Next: Configure Security Group

Add Tags
Configure Security Group
A security group acts as a virtual firewall that controls the traffic for one or more instances. When you launch an instance, you associate one or more security groups with the instance.
Configure:
Security group name:
Web Server security group- Description:
Security group for my web server
2. You will not log into your instance using SSH. Removing SSH access will improve the security of the instance.
3. Delete the existing SSH rule.
4. Click Review and Launch

Configure Security Group
Review Instance Launch
The Review page displays the configuration for the instance you are about to launch.
- Click Launch
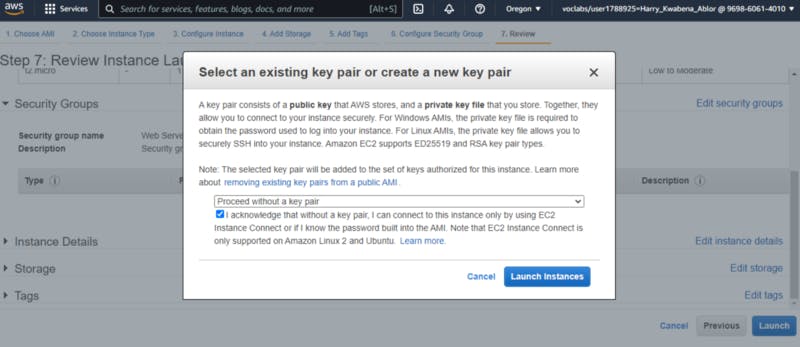
- A Select an existing key pair or create a new key pair window will appear.
- Amazon EC2 uses public–key cryptography to encrypt and decrypt login information. We are not going to use a key-pair for this tutorial.
- Click the Choose an existing key pair drop-down and select Proceed without a key pair.
- Select I acknowledge that ….
Review Instance Launch
6. Click Launch Instances. Your instance will now be launched. On the Launch Status page, note the identifier for your new EC2 instance, for example: i-0288d65fd4470b6a9. Click on the identifier for your new EC2 Instance.

Launch Instances
8. The instance will appear in a pending state, which means it is being launched. It will then change to running, which indicates that the instance has started booting. There will be a short time before you can access the instance.
9. The instance receives a public DNS name that you can use to contact the instance from the Internet.
10. Your Web Server should be selected. The Description tab displays detailed information about your instance.
11. Wait for your instance to display the following:
- Instance state: running
Status checks: 2/2 checks passed
Congratulations! You have successfully launched your first Amazon EC2 instance.
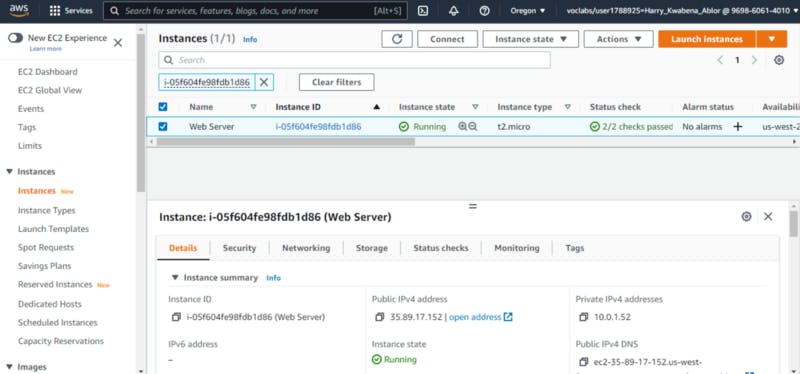
Launched Instance Overview
Update Your Security Group and Access the Web Server
When you launched the EC2 instance, you provided a script that installed a web server and created a simple web page. In this task, you will access content from the web server.
- Click the Details tab.
- Copy the Public IPv4 address of your instance to your clipboard.
- Open a new tab in your web browser, paste the IP address you just copied, then press Enter.

Public IPv4 address
4. Are you able to access your web server? Why not?
You are not currently able to access your web server because the security group is not permitting inbound traffic on port 80, which is used for HTTP web requests. This is a demonstration of using a security group as a firewall to restrict the network traffic that is allowed in and out of an instance.
5. To correct this, you will now update the security group to permit web traffic on port 80.
6. Keep the browser tab open, but return to the EC2 Management Console tab.
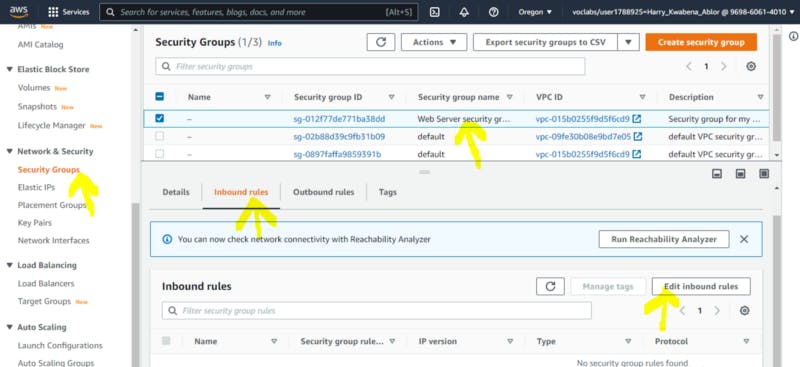
7. In the left navigation pane, click Security Groups.
8. Select Web Server security group.
9. Click the Inbound Rules tab.
Web Server security group
10. The security group currently has no rules.
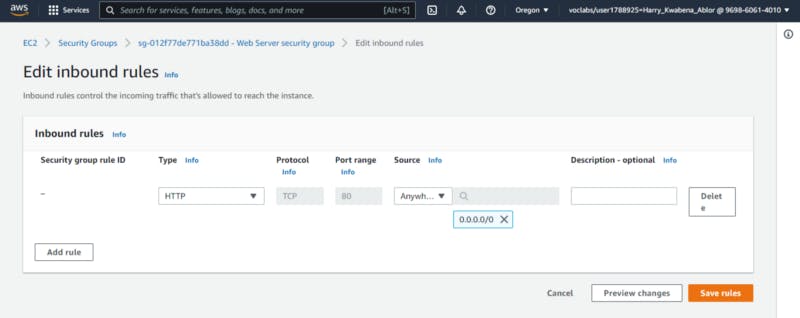
11. Click Edit inbound rules then configure:
- Type: HTTP
- Source: Anywhere
- Click Save rules
Edit inbound rules
12. Return to the web server tab that you previously opened and refresh the page.
13. You should see the message Hello From Your Web Server!
- Congratulations! You have successfully modified your security group to permit HTTP traffic into your Amazon EC2 Instance.

Hello From Web Server!
We have finally installed a web server using AWS EC2. There are many use cases for the AWS EC2 and we have just completed one of the simple use cases. Amazon Elastic Compute Cloud (Amazon EC2) offers the broadest and deepest compute platform, with over 500 instances and choice of the latest processor, storage, networking, operating system, and purchase model to help you best match the needs of your workload. Find out more on the AWS EC2 page (https://aws.amazon.com/ec2/).